
Background: When provisioning a Windows VM using the Clone Workflow and a vSphere customization specification that joins the computer to an active directory domain, the computer object is placed in the “Computers” container. I want to change that. 🙂
Solution Overview:
Modify the built-in Stub workflow to execute a Powershell script that moves the computer object based on the Business Group.
Preparation:
- Created a new Build Profile with the
ActiveDirectoryCleanupPlugin, MiscellaneousVrmProperties, RemoteDesktopProtocolPropertiesandVMwareWindows2008R2_64PropertiesProperty Sets.
vCAC Build Profile Properties - Created a new Windows 2008 R2 VM from a vSphere template, did not power-on. Took a snapshot
- Created a new shared vSphere Linked Clone Blueprint, included a customization specification that joins the machine to the domain

vCAC Windows Blueprint Information 
vCAC Windows Blueprint Build information - Created a Business Group, Created a reservation for them, entitled the Business Group to the service and catalog item for the Windows Server
- Tested requesting a new machine, it was provisioned, sysprepped and joined the domain correctly. I was annoyed that the computer object was in the “Computers” container.
- Installed the VMware vCloud Automation Center Designer (found at
https://your-vcac-server:5480/i) on the IaaS Server. - Installed Active Directory module for Windows PowerShell part of RSAT on the IaaS Server


Steps
- We’ll need to indicate where we want the Computer Object moved to, so we’ll add that property. Since I wanted all of my Business Group’s computer objects in the same place, I added a property named
targetOUto the Business Group and assigned the distinguishedName of the OU.
targetOU property added to Business Group - Save the PS script to C:\scripts\movecomputer.ps1
Import-Module ActiveDirectory

write "VM Name - $vmName" | out-file c:\scripts\invoketest.txt

write "Target OU - $targetOU" | out-file c:\scripts\invoketest.txt -Append

Get-ADComputer $vmName | Move-ADObject -TargetPath $targetOU
This script will write out our variables to a text file, so we can verify that they’re getting passed correctly. Then it performs the move. Please note that this will be executed by the DEM, so make sure the execution account has permissions to perform this action in AD.
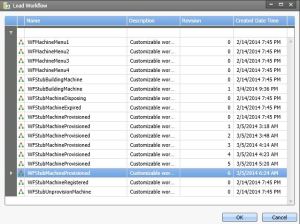
- Launch the vCAC Designer, Load the
WFStubMachineProvisionedworkflow from the list
vCAC Designer Workflows - In the “Machine Provisioned” try loop, locate and double-click on the “Custom-Code” item.

Custom Code section in workflow - From the toolbox, under
DynamicOps.Cdk.Activities, drag theGetMachineNameelement into theCustom Codebox - From the toolbox, under
DynamicOps.Cdk.Activities, also drag theGetMachinePropertyandInvokePowerShellelements into theCustom Codebox, nearGetMachineName - Drag a connection from one of the “tabs” on the Start element to the GetMachineName element, from GetMachineName to GetMachineProperty and from GetMachineProperty to InvokePowerShell

vCAC Designer – Workflow Custom Code Wiring - While still in the Custom Code element, click “Variables” (near the bottom), click Create Variable and enter
vmNamefor the name, leave the variable type as String. Repeat with a variable namedtargetOU. These are going to hold the values we want to work with through the workflow.
Custom Code Variables - Select the
GetMachineNameelement. On the Properties pane to the right, enterVirtualMachineIdin the MachineId field. In the MachineName field, entervmName. Ok, so where do these come from?!
If you click on “Arguments” while in the GetMachineName element, you’ll see two,VirtualMachineIdandExternalWorkflowId. These are standard internal values that are used in these external workflows. So, we’re providing the VirtualMachine Id GUID to the system to look up the Virtual Machine Name. The “vmName” value is the name of the variable we assigned a moment ago and the GetMachineName element enters the retrieved Name into thevmNamevariable.
GetMachineName Properties - Now select the GetMachineProperty element and work with its properties. Just like before, set the MachineId to VirtualMachineId. Here, we want to retrieve the value in the “targetOU” property and set it in the
targetOUvariable. So set the PropertyValue totargetOUwithout quotes and the PropertyName to"targetOU"WITH QUOTES.
GetMachineProperty Properties - Select the InvokePowerShell element. Notice there are several more properties in with this one – don’t worry, we’re only going to use a few. In my case, I chose to use a PS script instead of a one-liner. This way, I could modify the script without modifying the workflow. So, check the box labelled “IsScript” and set the CommandText to the full path of the PS script in quotes. In this case, use
"C:\scripts\movecomputer.ps1".
InvokePowerShell Properties - Our script expects two variables to be provided;
$vmNameand$targetOU, so click the ellipsis beside PowerShellVariables. Click Create Argument to add a new variable. Set the name tovmName, leave the direction as In and the type as String, set the value also tovmName” no quotes. Repeat fortargetOU. Here, we’re telling it to create PowerShell Variables and set their values to the values of the workflow. Click Ok
PowerShell Variables - Click “Send” to upload the modified workflow to the Model Manager. Now that we’ve created the workflow, we need to make sure it fires when we want it to.
- Back in vCAC Infrastructure, modify the Windows blueprint by adding a property named
ExternalWFStubs.MachineProvisioned. No value needed. This way, when this shared blueprint is used by any Business Group, the computer object will be moved to
the OU given in the Business Group’s targetOU property.
Property Added to blueprint to call customized workflow


Results
When an entitled member of Business Group 1 requests a VM from the Windows 2008 R2 catalog item, the VM is correctly created as a linked clone, assigned an IP address from the network profile and its Computer Object moved as expected.
I probably should have broken this into multiple parts…
References:
I would still be twiddling my thumbs if it weren’t for the following enormously helpful bloggers:

One thought on “Extending vCAC IaaS to fix an annoyance”
Comments are closed.